
Nothing beats the aroma of crispy, golden samosas frying in hot oil. Whether served with tangy tamarind chutney or spicy mint dip, samosas are the ultimate comfort snack — crunchy on the outside, soft and flavorful inside. This detailed step-by-step recipe will guide you through making perfect samosas from scratch, right in your kitchen.
Let’s dive into the art of samosa-making, where every fold, spice, and fry counts.
Ingredients
For the Dough:
- 2 cups all-purpose flour (maida)
- 4 tablespoons oil or ghee
- ½ teaspoon salt
- Water as needed (about ½ cup)
For the Potato Filling:
- 4 medium potatoes (boiled, peeled, and mashed)
- 1 cup green peas (boiled)
- 1 teaspoon cumin seeds
- 1 teaspoon mustard seeds (optional)
- 1 tablespoon oil
- 1 teaspoon grated ginger
- 2 green chilies, finely chopped
- ½ teaspoon turmeric powder
- 1 teaspoon coriander powder
- ½ teaspoon cumin powder
- ½ teaspoon garam masala
- 1 teaspoon dry mango powder (amchur) or lemon juice
- Salt to taste
- Fresh coriander leaves, chopped
For Frying:
- Oil, as needed for deep frying
Step 1: Making the Dough
The dough is the backbone of your samosa — it determines whether your outer crust will be perfectly crisp or soft and soggy.
- Mix the dry ingredients: In a large mixing bowl, combine all-purpose flour and salt. Mix well to distribute the salt evenly.
- Add oil: Pour in the oil or ghee and rub it into the flour using your fingertips. Keep mixing until the flour starts to look crumbly and you can form a lump when pressed between your palms.
- Tip: This step is called “moyan” in Hindi, and it’s crucial for creating a flaky crust.
- Add water slowly: Start adding water little by little while kneading. The dough should be firm — not too soft like chapati dough.
- Rest the dough: Cover it with a damp cloth and let it rest for 30 minutes. Resting helps the gluten relax, making the dough easier to roll and shape later.
Step 2: Preparing the Potato Filling
The filling is what gives samosas their signature flavor — spicy, tangy, and fragrant.
- Heat oil: In a pan or kadhai, heat 1 tablespoon of oil on medium flame.
- Add spices: Add cumin seeds (and mustard seeds if using). Let them splutter. Then, add ginger and green chilies. Sauté for a few seconds until fragrant.
- Add powdered spices: Mix in turmeric, coriander powder, cumin powder, and garam masala. Stir quickly so the spices don’t burn.
- Add potatoes and peas: Toss in the boiled, mashed potatoes and green peas. Mix everything well.
- Season: Add salt and dry mango powder (or lemon juice). Adjust spice levels according to your taste.
- Add freshness: Stir in some chopped coriander leaves for aroma and color.
- Cool the filling: Once mixed, let the filling cool completely before stuffing. Warm filling can make the dough soggy and hard to seal.
Step 3: Rolling and Shaping the Samosas
Now comes the fun and slightly artistic part — shaping your samosas.
- Divide the dough: After resting, divide the dough into 6–8 equal portions. Roll each into a smooth ball.
- Roll it out: Take one dough ball, flatten it slightly, and roll it into an oval shape about 6 inches long and 5 inches wide.
- Cut in half: Using a knife, slice the oval into two equal halves (two semi-circles). Each half will make one samosa.
- Form a cone:
- Take one semi-circle and apply a little water along the straight edge.
- Fold it into a cone shape, sealing the edges firmly.
- Make sure the tip of the cone is tight and has no gaps.
- Stuff the filling: Fill the cone with 2 tablespoons of the potato-pea filling. Don’t overfill — leave enough room to seal the top.
- Seal the samosa: Apply water along the open edge and press to seal tightly, forming a triangle shape. Pinch the edges for a neat look.
- Repeat: Prepare all the samosas in the same way and place them on a plate, covering them with a damp cloth to prevent drying out.
Step 4: Frying the Samosas
The frying process is key to achieving that perfect crunch without greasiness.
- Heat the oil: Pour enough oil into a deep pan or kadhai. Heat it on low to medium flame. To test the temperature, drop a small piece of dough in the oil — it should rise slowly, not sizzle immediately.
- If it rises too fast, the oil is too hot and your samosas will become brown outside but remain raw inside.
- Fry slowly: Gently slide 3–4 samosas into the hot oil. Don’t overcrowd the pan.
- Cook on low heat: Let them fry on low flame. This slow cooking gives the crust its signature crispness. Turn occasionally for even browning.
- Golden perfection: Fry until they turn golden brown and crisp. This usually takes 10–12 minutes per batch.
- Drain: Remove and place on paper towels to drain excess oil.
Step 5: Serving the Samosas
Your kitchen will now smell heavenly — time to serve!
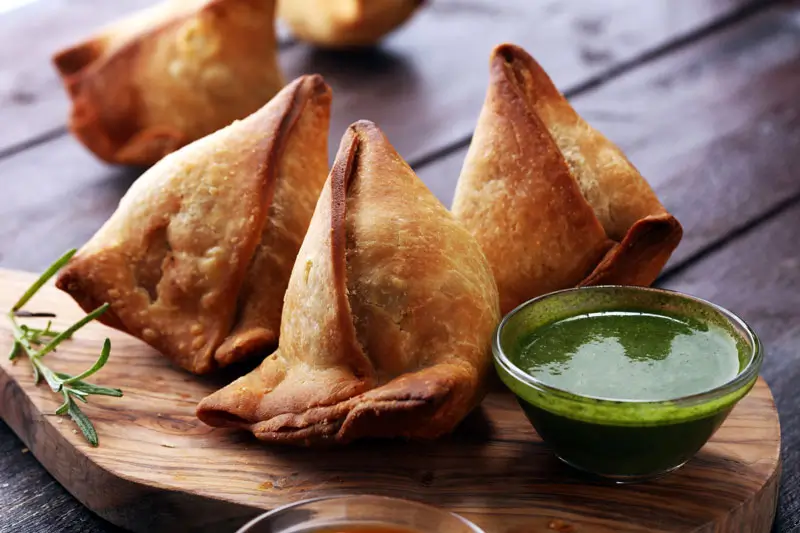
- Serve the samosas hot with green mint chutney, sweet tamarind chutney, or spicy garlic sauce.
- For a street-food twist, top them with chopped onions, yogurt, chutneys, and sev to make samosa chaat.
- Pair them with masala chai on a rainy evening — an unbeatable combo!
Tips & Tricks for Perfect Samosas
- Dough texture matters: If the dough is too soft, your samosas will absorb oil and lose crispness.
- Moyan (fat) is crucial: The amount of oil/ghee mixed into the flour determines how flaky the crust will be. Don’t skip or reduce it.
- Fry on low heat: Patience is key. High heat will only brown the outside too quickly.
- Seal tightly: Any gaps will cause the filling to leak during frying.
- Variations: Try adding paneer, minced meat, or even sweet fillings like coconut and jaggery for a creative twist.
Popular Samosa Variations Across India
- Punjabi Aloo Samosa: The classic version — spicy, tangy, and hearty.
- Keema Samosa: Stuffed with minced lamb or chicken, often enjoyed during Ramadan.
- Sweet Samosa (Mawa Samosa): Filled with khoya, dry fruits, and cardamom — a festive treat.
- Gujarati Lilva Samosa: Uses fresh pigeon peas and subtle spices for a milder taste.
- South Indian Onion Samosa: Crispy, thinner crusts filled with spiced onion and poha mixture.
Storage and Reheating
- Refrigeration: You can refrigerate fried samosas for up to 2–3 days. Reheat in an oven or air fryer at 180°C (350°F) for 5–7 minutes until crisp again.
- Freezing:
- Unfried samosas: Freeze them in a single layer, then store in a zip-lock bag.
- Frying from frozen: Fry directly from frozen — no need to thaw — just increase frying time by 2–3 minutes.
Why Homemade Samosas Are Worth It
While store-bought or ready-made samosas are convenient, homemade ones offer unbeatable freshness and flavor. You control the ingredients, spice levels, and oil quality. Plus, there’s immense joy in seeing those golden triangles puff and crisp up in your own kitchen — a true labor of love that brings family and friends together over tea and laughter.
Making samosas is more than just cooking; it’s a tradition — a celebration of texture, aroma, and flavor wrapped in a delicate, crunchy pastry.
So next time you crave something special, skip the takeaway and make your own golden, crunchy, irresistible samosas from scratch. You’ll not only impress your guests but also rediscover the magic of homemade Indian snacks.